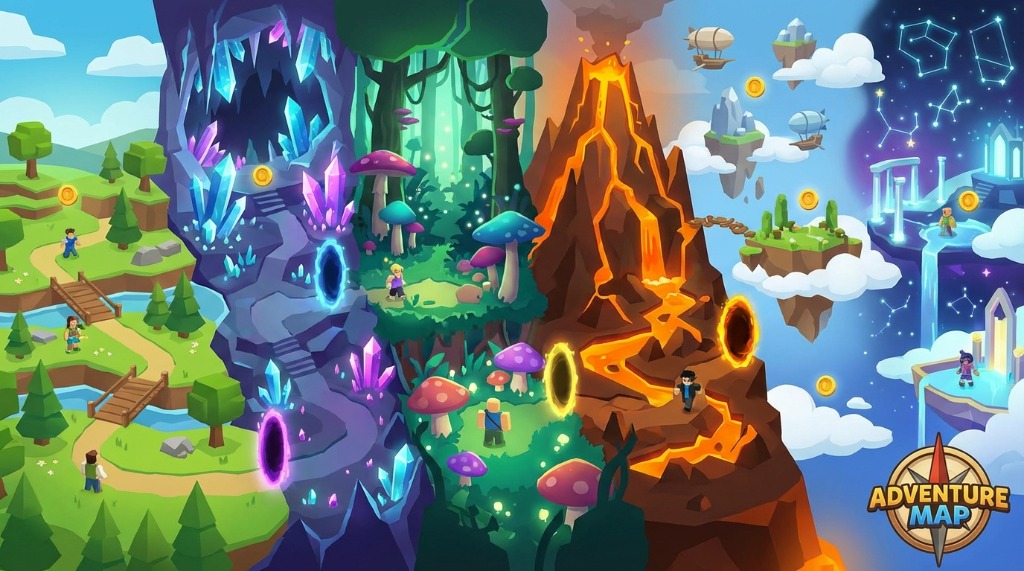
Break a Lucky Block takes you through multiple areas as you progress, each with its own Lucky Block tiers, visual themes, and rewards. Knowing what each area offers helps you plan your progression and set realistic expectations for how long each phase of the game takes.
This guide covers every area in the game, from the humble starting zone all the way to the ultimate Mythic realm.
Understanding the Area System
Areas in Break a Lucky Block serve several purposes:
- Progression gating – Higher areas require coin investments to unlock
- Better rewards – Each area has higher-tier blocks than the last
- Visual variety – Different themes keep the game fresh
- Achievement tracking – Unlocking areas is a measurable milestone
How Area Progression Works
The typical flow:
- Start in the first area for free
- Farm coins from blocks
- Save up for the next area’s unlock cost
- Enter the portal/gate when you can afford it
- Farm the new area’s better blocks
- Repeat
Each area is progressively more expensive, but the blocks are also progressively more valuable, so the income-to-cost ratio stays reasonable.
Area 1: Spawn Island (Starting Area)
Overview
This is where everyone begins. It’s intentionally simple—a tutorial zone to learn the mechanics without overwhelming you.
Theme: Basic, simple environment Cost: Free (starting area) Block Tiers: Common only Best For: First 10-15 minutes
What You’ll Find
- Common Lucky Blocks – Gray/basic colored blocks
- Tutorial elements – Often NPCs or signs explaining basics
- High spawn density – Blocks are plentiful
- Safe zone – Other players can’t interfere (usually)
Features
| Feature | Description |
|---|---|
| Shops | Basic pet eggs, limited items |
| NPCs | May have beginner quests |
| Portals | Gate to next area |
Strategy for Spawn Island
DO:
- Break blocks to learn controls
- Reach 100 coins ASAP
- Unlock second area immediately
- Claim any tutorial rewards
DON’T:
- Spend coins on upgrades here (maybe 1-2 Luck points)
- Stay longer than 10-15 minutes
- Miss any codes or free gifts
When to Leave
Leave as soon as you have 100 coins for the second area. There’s no benefit to farming Common blocks when Uncommon are available.
Area 2: Green Meadows
Overview
Your first real farming zone. This is where the game actually begins, and you’ll spend 1-2 hours here building your initial stats.
Theme: Grassy, natural environment Cost: ~100 coins Block Tiers: Common & Uncommon Best For: First hour of gameplay
What You’ll Find
- Uncommon Lucky Blocks – Green-tinted blocks with better drops
- Still some Common blocks – Mixed spawns
- First pet opportunities – Better egg drops
- More open space – Larger area than spawn
Features
| Feature | Description |
|---|---|
| Block variety | Mix of Common/Uncommon |
| Pet eggs | Uncommon eggs start appearing |
| NPCs | Some quests available |
Strategy for Green Meadows
Focus:
- Upgrade Luck to 50-100
- Get your first pet equipped
- Learn optimal farming patterns
- Save 1,000 coins for next area
Time investment: 1-2 hours typically
When to Leave
Once you have:
- 100+ Luck upgraded
- 1,000 coins saved
- At least one pet
- Confidence in your farming routine
Area 3: Crystal Caves
Overview
The underground zone introduces Rare blocks, which feel like a significant jump in reward quality. This is mid-early game—you’re getting serious now.
Theme: Underground caves with crystal formations Cost: ~1,000 coins Block Tiers: Uncommon & Rare Best For: Hours 2-5
What You’ll Find
- Rare Lucky Blocks – Blue-tinted blocks with solid drops
- Crystal aesthetics – Glowing environments
- Hidden areas – Some zones have secrets to discover
- Gem deposits – Potential bonus gem locations
Features
| Feature | Description |
|---|---|
| Rare blocks | Significantly better rewards |
| Hidden secrets | Explore for bonuses |
| Atmosphere | First visually impressive area |
Strategy for Crystal Caves
Focus:
- Push Luck to 200-300
- Target Rare eggs for better pets
- Consider first rebirth around here
- Save 10,000 coins for next area
Time investment: 2-4 hours typically
Key Milestone
This is often where players do their first rebirth. If progress starts feeling slow and you’ve explored the systems, consider resetting for permanent bonuses.
Area 4: Enchanted Forest
Overview
Epic blocks appear here, and the rewards take a noticeable jump. This is true mid-game territory—you’re invested in the game now.
Theme: Magical forest with glowing plants Cost: ~10,000 coins Block Tiers: Rare & Epic Best For: Hours 5-12
What You’ll Find
- Epic Lucky Blocks – Purple-glowing blocks with excellent drops
- Magical atmosphere – Enchanted visuals
- Event spawn point – Many events center here
- Quest NPCs – More advanced quests
Features
| Feature | Description |
|---|---|
| Epic blocks | Major reward jump |
| Event hub | Often central to events |
| Quest content | Advanced objectives |
Strategy for Enchanted Forest
Focus:
- Push Luck to 500-800
- Farm Epic eggs for strong pets
- Participate in any events
- Multiple rebirths recommended
- Save 100,000 coins for next area
Time investment: 4-8 hours typically
The Grind Sets In
This is where you’ll feel the game’s core loop most strongly. Farming, upgrading, farming, rebirthing, repeat. Set up AFK farming if possible to supplement active play.
Area 5: Volcanic Summit
Overview
Late mid-game. The difficulty and rewards both spike here, and you’ll need solid stats to farm efficiently.
Theme: Volcanic mountain with lava elements Cost: ~100,000 coins Block Tiers: Epic & Legendary Best For: Hours 12-25
What You’ll Find
- Legendary Lucky Blocks – Golden-glowing blocks with amazing drops
- Challenging terrain – More obstacles and hazards
- High-value farming – Significant coin rates
- Rare pet spawns – Better pet opportunities
Features
| Feature | Description |
|---|---|
| Legendary blocks | Best non-Mythic tier |
| Terrain challenges | Navigate carefully |
| Value density | High coins per hour |
Strategy for Volcanic Summit
Focus:
- Push Luck to 1,200-2,000
- Legendary pet acquisition priority
- AFK farming essential now
- Heavy rebirth cycling
- Save 1,000,000 coins for final area
Time investment: 8-15 hours typically
The Wall
Many players hit a perceived “wall” here where progress feels slow. This is normal. The solution:
- More rebirth cycles for permanent bonuses
- Optimal pet loadouts
- Playing during events
- Consistent AFK farming
Area 6: Sky Kingdom
Overview
Late game territory. Only Legendary blocks here—this is where serious grinders live.
Theme: Floating islands in the sky Cost: ~500,000 coins Block Tiers: Legendary only Best For: Hours 25-50
What You’ll Find
- Pure Legendary blocks – No filler tiers
- Floating islands – Impressive visuals
- VIP connections – May link to VIP areas
- Achievement zones – Late-game objectives
Features
| Feature | Description |
|---|---|
| Pure legendary | No wasted blocks |
| Visual peak | Most impressive standard area |
| Late-game hub | Where serious players gather |
Strategy for Sky Kingdom
Focus:
- Luck to 2,500-4,000
- Legendary pet collection
- Final rebirth pushes
- Prepare 1,000,000+ for Mythic
Time investment: 10-20 hours typically
Area 7: Celestial Realm (Final Area)
Overview
The endgame. Mythic blocks. The ultimate goal for any Break a Lucky Block player.
Theme: Cosmic, celestial environment Cost: ~1,000,000 coins Block Tiers: Mythic Best For: 50+ hours, endgame
What You’ll Find
- Mythic Lucky Blocks – Rainbow/red-glowing ultimate blocks
- Best rewards in game – Maximum value per block
- Exclusive drops – Items found nowhere else
- Achievement completion – Many achievements require reaching here
Features
| Feature | Description |
|---|---|
| Mythic blocks | Ultimate tier |
| Exclusive content | Unavailable elsewhere |
| Endgame status | You’ve made it |
Strategy for Celestial Realm
Focus:
- Luck 4,000+
- Mythic pet hunting
- Complete achievements
- Help newer players (pay it forward!)
Time investment: Ongoing—this is where you live now
Area Comparison Table
| Area | Cost | Blocks | Luck Target | Time to Unlock |
|---|---|---|---|---|
| Spawn Island | Free | Common | 0 | Start |
| Green Meadows | 100 | C/UC | 100 | 15 min |
| Crystal Caves | 1K | UC/R | 300 | 1-2 hrs |
| Enchanted Forest | 10K | R/E | 800 | 4-6 hrs |
| Volcanic Summit | 100K | E/L | 2000 | 12-20 hrs |
| Sky Kingdom | 500K | L | 3500 | 25-40 hrs |
| Celestial Realm | 1M | M | 5000+ | 40-60 hrs |
Secret Areas (If Available)
Some games include hidden areas:
Hidden Cave (Crystal Caves)
- Find a secret entrance in the walls
- Bonus spawns and hidden rewards
Treehouse (Enchanted Forest)
- Requires high jump or special item
- Exclusive pet egg location
Lava Chamber (Volcanic Summit)
- Needs heat resistance
- Ultra-rare spawns
How to Find Secrets
- Explore thoroughly
- Look for unusual wall textures
- Watch for community hints
- Check Discord for tips
Progression Tips
Don’t Rush
Match your tier to your stats. Unlocking Legendary doesn’t help if you can’t farm it efficiently.
Events Affect Areas
During events:
- Event blocks may spawn in specific areas
- Bonuses might be area-specific
- Check event details for optimal farming locations
Server Population by Area
Higher areas typically have:
- Lower population (fewer players reach them)
- Better farming conditions
- Less competition for blocks
Related Articles
Last updated: February 2026